This tutorial will show you how to create a basic email campaign (like a newsletter) with a file attached. If you want to learn how to make a custom email design, please follow the instructions here before creating a new campaign: How to Create a New Email Template.
*Note: you can only attach files to a BASIC newsletter design template, not a custom one.
- Log into your AMG email marketing system and click on the tab along the top that says "Campaigns." Look for a big blue button on the upper right that says Create New Campaign and click that.

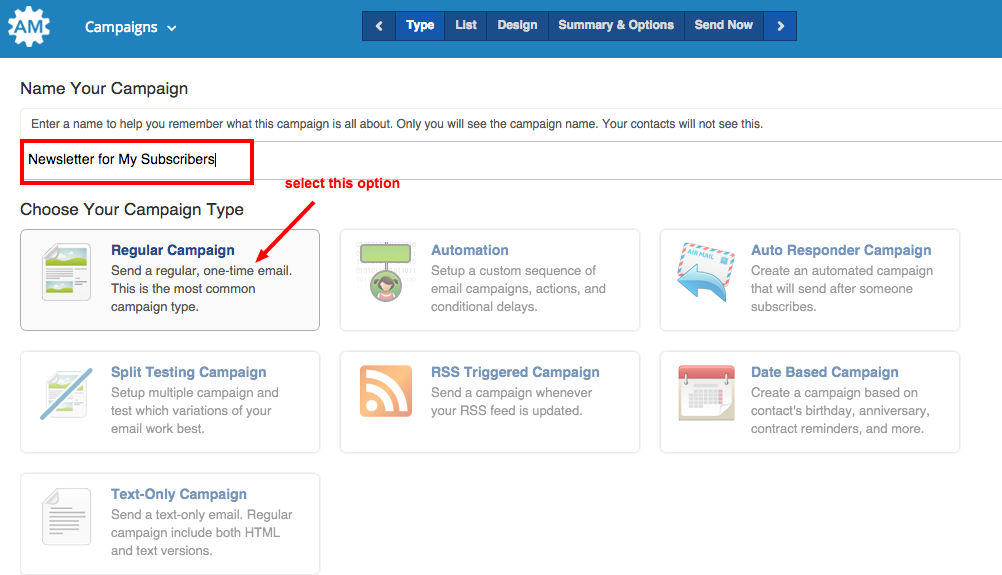
- Name your campaign with something that will help you distinguish it (this is only visible to you, so call it whatever you want). Remember, you will be able to edit/re-use this campaign in the future too!
- Choose "Regular Campaign" and then scroll down to the bottom to click "Next."
Choose the list you want to send your campaign to, and then click "Next." (You can select more than one list if you want)
Select the "Basic Design" email template by hovering over it until you see the option to "Use This Design." *Remember, you can only attach files to the Basic Design template. If you don't want to attach a file, you can choose from any of the other options or create your own. 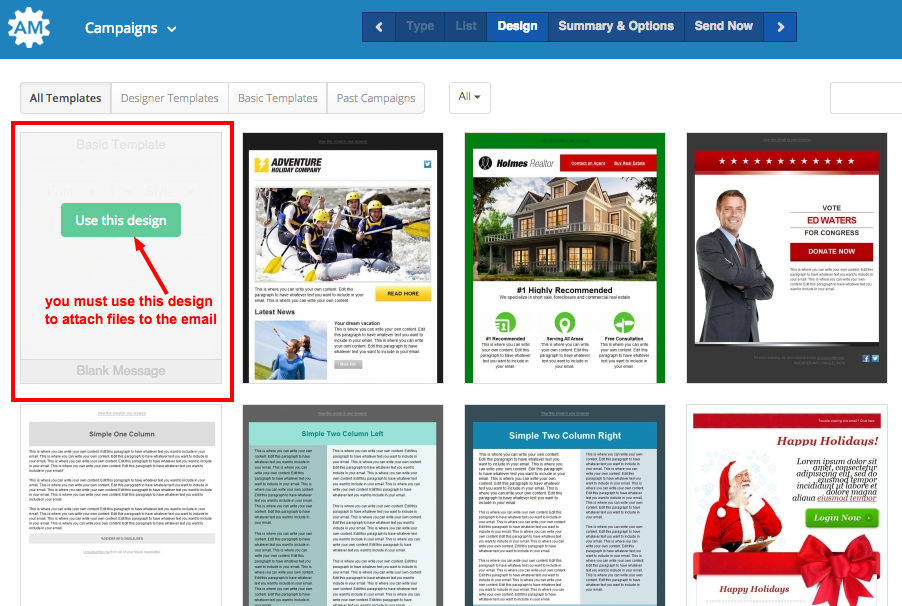
Click "Use This Design" and you will get a popup window to fill in the "From" name and email for the campaign, as well as the subject. This should be either your first and last name or your company name, and your email address. Choose a subject that tells your readers what they are opening (ie "June Newsletter"). Click "Continue" 
Use the text editor window to type your message (you can use the tools in the toolbar to choose font styles & colors, add links, or even upload images).
-
You can also set up the shortcodes that automatically populate your reader's First Name, etc. by clicking on the link that says "Personalize Message" in the upper right of the screen (it will add something like this to your email: %FIRSTNAME% and that will be replaced with your subscriber's first name when they receive the email)
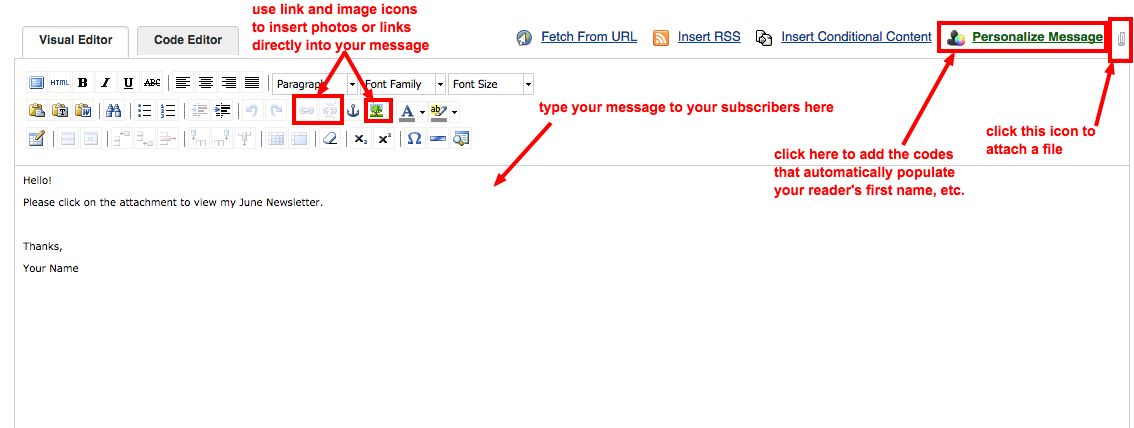
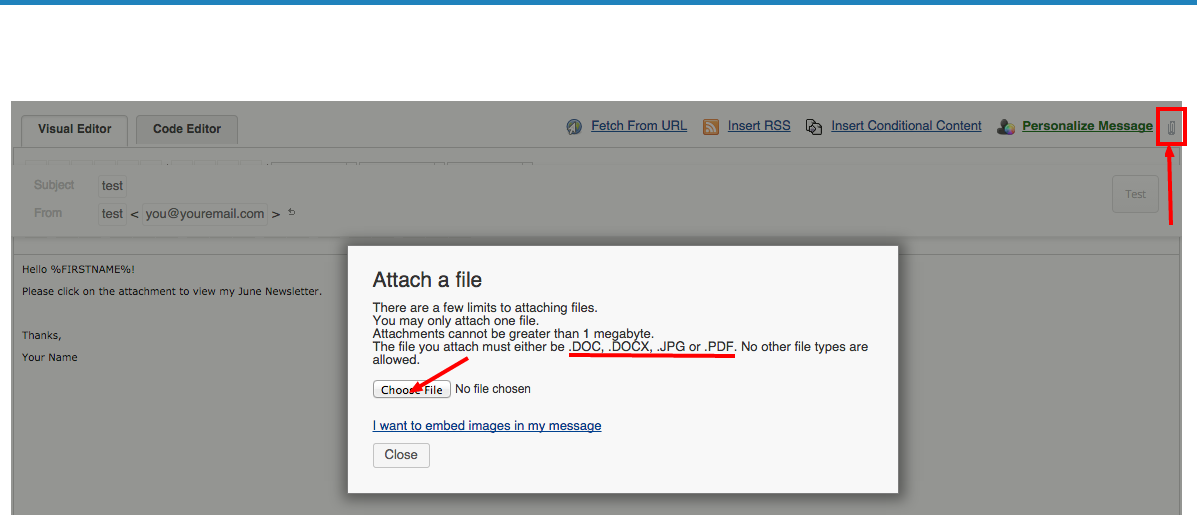
To attach a message to your email, click on the paperclip icon on the upper right of the screen. You will see a popup window with the option to "Choose File" - click this to browse for your attachment file on your computer. After you select your file from your computer, the window will show your file name with a checkmark next to it if you have successfully attached a file. Then, click close to return to your message.
-
*NOTE: Attachments must be smaller than 1MB, and can only be in .doc, .docx, .jpg, or .pdf format!
After you have finished writing your message and attached your file, scroll down to the bottom and click "Next."
This will take you to the Summary and Options page, where you can review your subject line, the list you are sending to, and other important info. It is recommended that you send yourself a test email so that you can see what your readers will see, and double-check to make sure your links and attachments are working properly before you send. This is also where you can set a date/time if you want to schedule your campaign in advance. 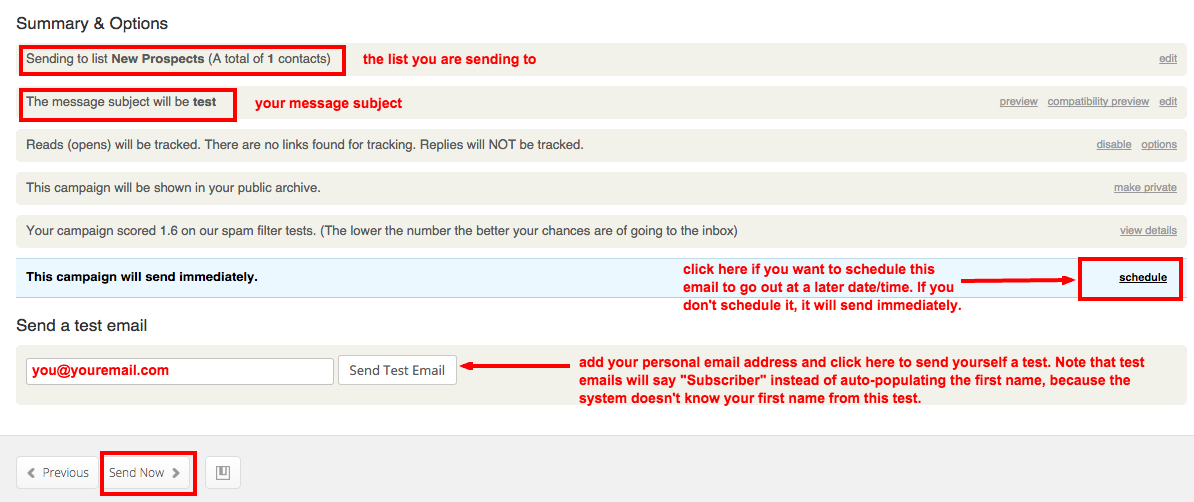
If you are scheduling your campaign in advance, you can choose your date and time to send when you click on the link that says "schedule". The option at the bottom of the page will then say "Finish", and your campaign will be in the queue until the selected send time. 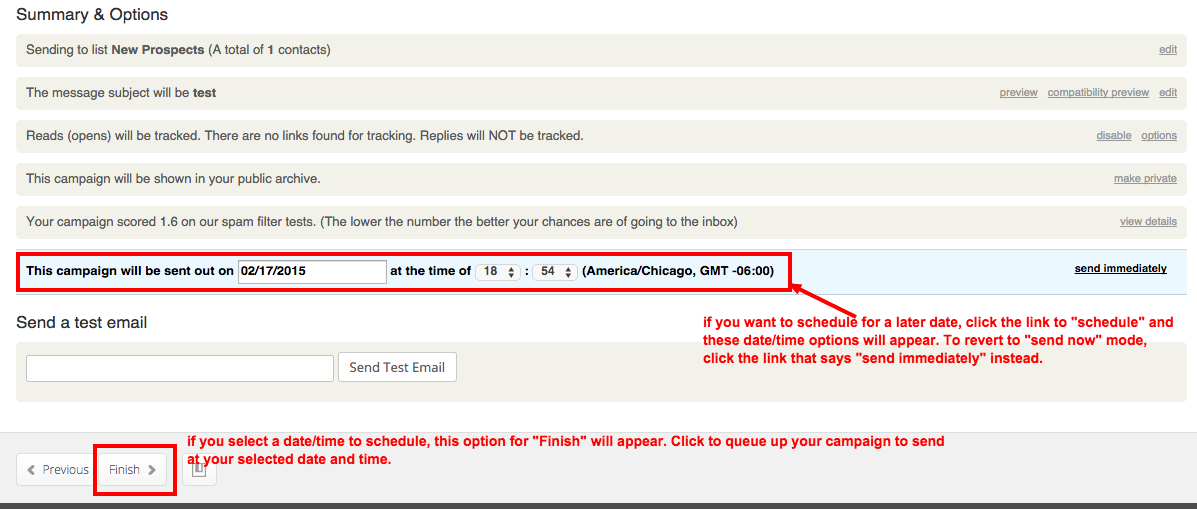
If you want to send your campaign immediately, don't click "schedule", and you will see the option at the bottom of the page to "Send Now." Click this to send your campaign right away! 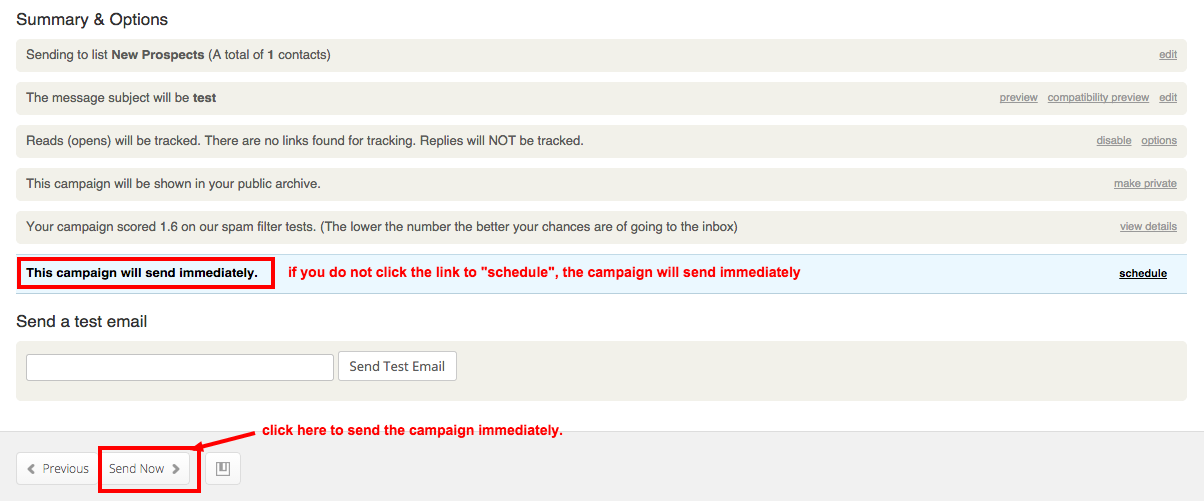
At any time, you can navigate to a different area of the email marketing system, and your email will automatically save as a draft. You can find the drafts by clicking on "Campaigns" and then clicking "Continue" next to the draft you want to complete.


